REVIEW · PHOTOGRAPHY SESSIONS
Amsterdam Photography Masterclass – Private Photography Lesson
Book on Viator →Operated by Aperture Tours · Bookable on Viator
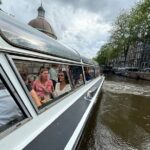
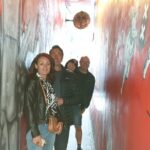
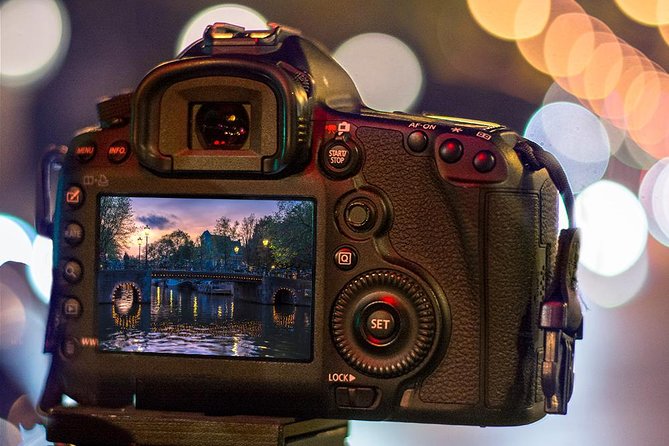
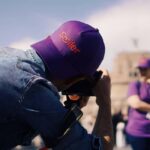
Stop pointing and start shooting. This private Amsterdam class turns famous canals and landmarks into a guided photo plan, with a professional photographer leading you and free access for the key stops. I like that you spend real time at photogenic places, not just sightseeing, and you get practical direction you can use the next day. One thing to consider: you’re expected to bring your own DSLR, and a tripod is only available if you request it.
You can pick daytime or evening and get coached for the light you’ll actually be using. The tour runs in all weather, and it stays to a manageable pace, with a maximum group size of four people. If you’re hoping for a camera loan or an everything-provided workshop, you’ll want to know that this is coaching-focused, not gear rental.
In This Review
- Key highlights to know before you go
- A private Amsterdam photo masterclass that teaches you how to see
- Where the walk begins: Leidsekade 97 and how to get oriented fast
- Amsterdams Lieverdje to Voetboogstraat: learning framing at street level
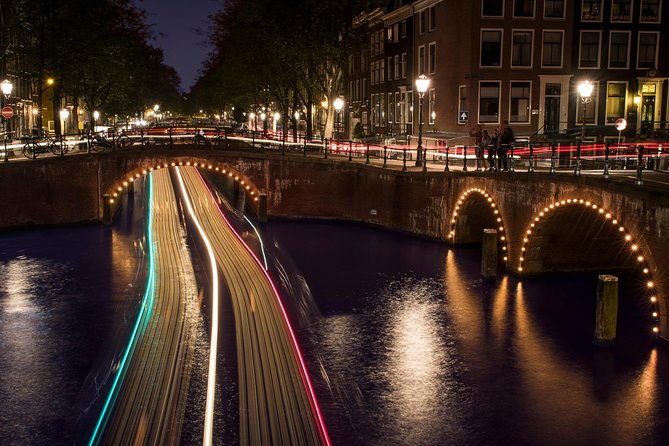
- Leidsegracht and bridges: how to photograph motion without blur
- Rijksmuseum grounds and Nieuwe Kerk: big architecture, strong composition
- Magere Brug and the Amstel: night-friendly coaching for real light
- Blauwbrug, Nieuwmarkt, and Huis Bartolotti: turning details into photos
- Camera coaching that changes what you do between shots
- Daytime vs evening: pick your light and your mood
- What to pack and how to dress for all-weather lessons
- Timing, pacing, and why 20 minutes per stop is just right
- Value check: what you get for $204.24 per person
- Who this Amsterdam Photography Masterclass suits best
- Should you book this photography lesson?
- FAQ
- How long is the Amsterdam Photography Masterclass?
- Is this tour private?
- What’s the maximum group size?
- Is the tour offered in English?
- Do I need to bring my own camera?
- Is a tripod included?
- Are there admission fees for the photo stops?
- Does the tour run in bad weather?
- What is the meeting point?
- Can I cancel for a refund?
Key highlights to know before you go
- A private lesson for up to 4 people so your guide can adjust to your camera and goals
- Around 20 minutes per stop at major photo spots, so you get time to test ideas
- Day or evening options with instruction that fits the light and timing
- Free admission tickets for the listed stops so your budget stays focused on the experience
- DSLR-friendly coaching with hands-on tips and setting guidance during your walk
- A pro who helps you frame like a photographer instead of just taking random snaps
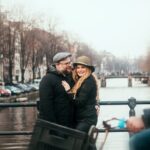
A private Amsterdam photo masterclass that teaches you how to see
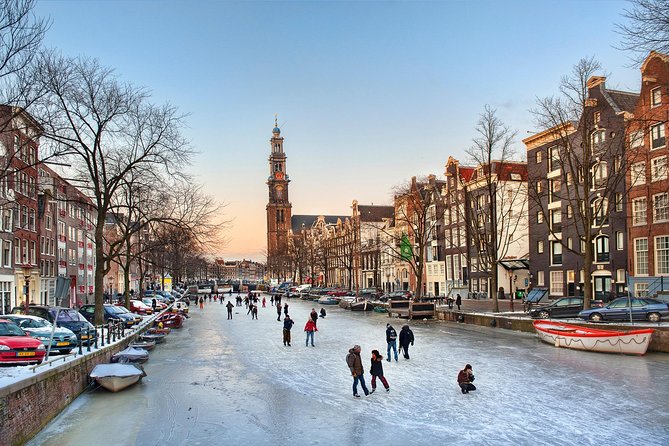
Amsterdam is perfect for photography, but it can also trick you. You see canals, bridges, and brick buildings and think you’re already doing it right. Then you review your photos and realize they’re blurry, too dark, or they miss what your eyes loved in the moment.
That’s why this type of private lesson is smart value. You’re not stuck following a bus tour rhythm. You’re walking with a professional photographer who gives clear, doable instructions while you’re standing in the actual scene. It’s less about theory and more about getting better fast.
This masterclass is built around a tight set of photo stops around the city center. You’ll be moving on foot for about three hours, and you’ll typically get roughly twenty minutes at each location. That timing matters. It gives you a chance to try a setting, adjust your framing, and then repeat with better control, instead of rushing to one single shutter click.
You can also read our reviews of more private tours in Amsterdam

Where the walk begins: Leidsekade 97 and how to get oriented fast
The meeting point is Leidsekade 97, 1017 PN Amsterdam. It’s close to public transportation, which is handy if your hotel is elsewhere in town or you don’t want to arrive on a long tram-and-walk mission.
The first practical benefit here is mindset. Starting in a real public street setting means your guide can talk about what actually affects a photo: angle, background clutter, and how light falls across buildings and water. You’ll also get a quick sense of how the lesson will flow through the city, which helps you stop feeling like you’re just moving from one postcard view to the next.
Small group size also changes the experience. With a maximum of four people per booking, your guide can slow down when you need it, and speed up if you’re already comfortable. That’s a big deal when you’re learning camera basics or trying night shooting techniques.
Amsterdams Lieverdje to Voetboogstraat: learning framing at street level
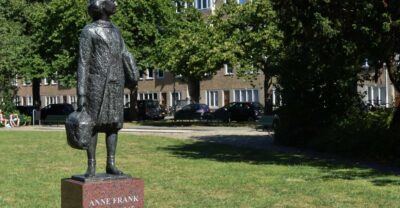
You start with Amsterdams Lieverdje, the statue that locals know and visitors often miss until they’re close. This stop is a great starter because it’s a small subject with lots of surrounding detail. Your guide can show you how to avoid the classic tourist trap: filling the whole frame with everything at once.
Then you move to Voetboogstraat, where you’ll shoot the area around Beijbhof de Voetboogsteeg. This is the kind of Amsterdam alley-and-street setting that teaches you more than any single landmark. You’ll learn how to work with layers: foreground texture, midground faces of buildings, and the background lines that pull the eye forward.
One reason I like early stops like these is that they build confidence. If you’re new to DSLR shooting, you can test changes quickly without needing a perfect sunset backdrop. If you’re more experienced, street scenes are where you sharpen composition and control distractions.
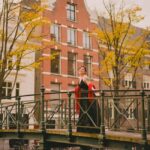
Leidsegracht and bridges: how to photograph motion without blur
Leidsegracht is where Amsterdam starts to feel like a live scene rather than a set. You’ll focus on the bridges along Leidsegracht, and that’s a smart choice for your learning because bridges combine geometry with water reflections.
This is also where your guide can help you think in practical terms:
- What are you trying to emphasize: the bridge shape, the canal reflections, or the people passing through?
- Are you trying to freeze movement or soften it?
- Where should the viewer’s eye land first?
Bridges are perfect for practicing leading lines and symmetry, but they also highlight a common problem: it’s easy to end up with photos that are technically fine but visually flat. A good guide helps you “aim” your composition so the scene has depth.
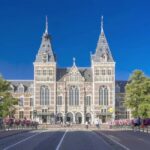
Rijksmuseum grounds and Nieuwe Kerk: big architecture, strong composition
The Rijksmuseum and the grounds around it are huge photo magnets. But just because a building is famous doesn’t mean your photos automatically work. In this lesson, you’re using it as a training ground for camera decisions: where to stand, what angle gives the cleanest lines, and how to frame the building so it doesn’t look like a generic front view.
You’ll also shoot Nieuwe Kerk. Churches in Amsterdam can feel busy in real life, but that’s why they’re useful for learning. You’ll practice isolating the subject and choosing what background details to keep or remove. Even small adjustments to position can change the whole image.
If you’re hoping to improve your architecture photos, this is the kind of stop that pays off. You’ll likely come away with a better sense of perspective control, and you’ll see how to use the environment instead of fighting it.
You can also read our reviews of more photography tours in Amsterdam

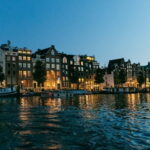
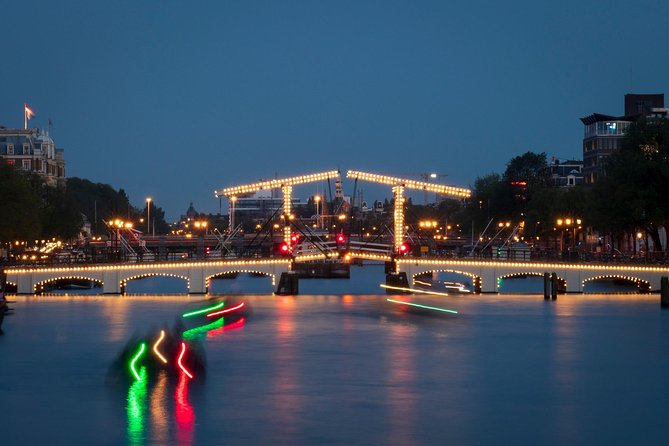
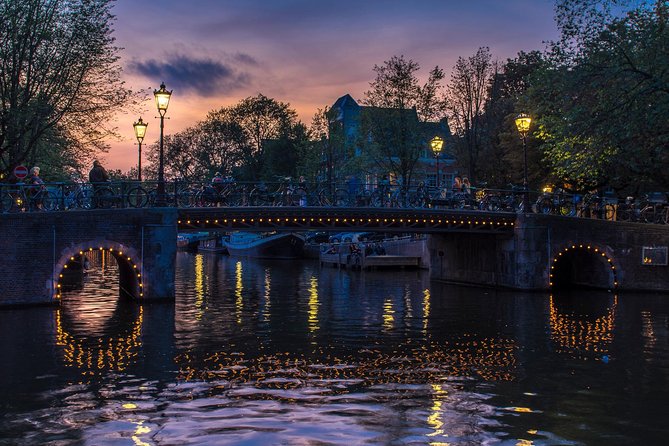
Magere Brug and the Amstel: night-friendly coaching for real light

Magere Brug, also called the Skinny Bridge, is a classic. It’s romantic in person, and it’s also photogenic for very practical reasons: the bridge structure stands out against water, and reflections can help your photo feel richer.
This is the stop where evening choices can matter most. If you pick an evening tour, your guide can focus on night photography basics and help you avoid the two most common problems: images that are too dim and shots that blur when you think your settings should work.
In one recent class, an instructor named Renzo helped a student learn how to shoot night photos, and the improvement came quickly. That’s exactly what you want from a lesson: not just tips you read online, but direction you can apply on the spot while the bridge and canal are right there.
Even if you choose daytime, Magere Brug is still valuable because it teaches you how to manage contrast between light highlights and darker areas of the scene.
Blauwbrug, Nieuwmarkt, and Huis Bartolotti: turning details into photos
Not every great Amsterdam photo is a huge landmark. Toward the later part of the tour, you’ll shoot Blauwbrug and then Nieuwmarkt. These stops help you shift from wide architectural shots to the more human scale of street scenes and plaza energy.
Then you’ll move to Huis Bartolotti (the Museumhuis Bartolotti). This one is important for learning because it nudges you toward detail work. You practice tighter framing, textures, and the “small but powerful” composition choices that often look more artistic than a straight postcard.
The value here is that you come back to your hotel with variety. You’ll have:
- bridge and canal compositions,
- big building frames,
- and detail shots that feel personal.
That mix is what makes your photos look like you actually learned something, not just visited places.
Camera coaching that changes what you do between shots
This class is built around practical photography. You’re not only seeing where to aim; you’re being taught camera decisions while you’re actively shooting.
A few coaching themes are worth thinking about before you arrive:
- Your guide will help you connect what you see to settings you can control.
- You’ll get pointers on framing and timing, especially at busy or reflective spots like canals and bridges.
- If you need a tripod, you can request one, but it’s not assumed to be included.
Also, bring the camera you’re comfortable with. The tour specifically asks you to bring your own DSLR. That means the lesson is geared toward using your real controls and learning in a way that transfers to the rest of your trip.
If you want an example of how instruction can feel, one instructor, William, tailored the walk based on what a student wanted to photograph and delivered clear pointers on camera settings. That kind of personalization is hard to get on a standard group tour, and it’s one reason this format works.
Daytime vs evening: pick your light and your mood
You can choose between daytime and evening tours. That matters because Amsterdam’s photos aren’t just about subjects; they’re about the quality of light.
Daytime is typically easier for beginners. Your exposure decisions are simpler, and you can focus on composition, angles, and keeping your background clean. It’s also a great choice if you want crisp detail and reflections without worrying as much about low-light stability.
Evening is where you get more dramatic results, but also more learning pressure. Your guide can help you handle the challenges of night shooting, like exposure and keeping photos sharp. If night photography has ever felt frustrating, this is a practical way to fix that without guesswork.
What to pack and how to dress for all-weather lessons
The tour operates in all weather conditions. That’s a good sign because Amsterdam weather can change fast, and you don’t want your learning to get stuck in a forecast lottery.
Plan to dress for walking and damp conditions. You’re out for about three hours, and you’ll be changing positions often, which means you’ll feel temperature and wind more than you might in a museum.
In terms of gear, the essentials are simple:
- your own DSLR camera,
- and optional tripod support if you request it.
Service animals are allowed, so the experience can adapt to different needs, but you should still plan on a walking-based photo lesson.
Timing, pacing, and why 20 minutes per stop is just right
A common problem with photography tours is that you spend too little time at each spot. You snap a few shots and leave without learning what went wrong or how to improve.
Here, the rhythm is intentionally balanced: about twenty minutes per stop, across multiple iconic locations. That gives you a loop you can repeat:
1) Set your idea,
2) Shoot a few frames,
3) Get guidance,
4) Adjust and reshoot.
By the end, you should be producing stronger images in less time, which is the real win.
Value check: what you get for $204.24 per person
At $204.24 per person for about three hours, this isn’t a budget add-on. But the price makes sense if you look at what you actually receive: a private tour, a local guide, and a professional photographer guide for the full session.
You also get free admission tickets for the listed stops, which helps keep your cost predictable. And the group size cap of four people means you’re still likely to get real one-on-one attention, not diluted coaching.
If you compare it to paying for a generic city walk plus trying to learn camera settings on your own, this format feels like a shortcut. You’re paying for feedback in the moment. That’s hard to replace with YouTube tutorials, especially when you’re photographing in low light, reflections, and tight urban angles.
Who this Amsterdam Photography Masterclass suits best
This tour is a strong fit if you:
- want DSLR coaching you can apply immediately,
- feel stuck with camera settings and want someone to help you make sense of them,
- love Amsterdam enough to return with photos that actually match what you saw,
- or you want a day plan that doubles as a photo workshop.
It’s also a smart choice if you’re traveling with one or two friends. The maximum group size of four means you can learn together without turning into a noisy crowd.
If you already shoot with confidence and only want a few “best angle” photos, you might find it more useful to take the lesson once and then use the skills across the rest of your trip.
Should you book this photography lesson?
I think you should book it if you want faster improvement and photos that feel intentional. The private format, the stop-by-stop structure, and the guidance for both daytime and night shooting are the big reasons.
Skip it only if you’re expecting the camera gear to be provided, or if you’d rather wander without instruction. This is an active class where you’ll learn by shooting and adjusting, not a passive walk where you hold your camera up and hope for the best.
If Amsterdam is on your list and you care about getting better photos instead of just more photos, this one is worth your time.
FAQ
How long is the Amsterdam Photography Masterclass?
It runs for about 3 hours.
Is this tour private?
Yes, it’s private. Only your group will participate.
What’s the maximum group size?
The maximum is 4 people per booking.
Is the tour offered in English?
Yes, it’s offered in English.
Do I need to bring my own camera?
Yes. You’re asked to bring along your own DSLR camera.
Is a tripod included?
A tripod is not included, but it’s available upon request.
Are there admission fees for the photo stops?
Admission tickets for the listed stops are free.
Does the tour run in bad weather?
Yes. It operates in all weather conditions, so dress appropriately.
What is the meeting point?
The meeting point is Leidsekade 97, 1017 PN Amsterdam, Netherlands.
Can I cancel for a refund?
Yes, you can cancel for free up to 24 hours in advance for a full refund.